Wednesday, January 30, 2013

Whole Wheat Italian Bread (Sourdough)

Yum

A delicious and soft whole wheat sourdough loaf with a chewy crust.

My favorite bread to make is Italian bread.  It is one of the first breads I ever made back when I was a broke college student and just became interested in bread baking.  I still use the same bread book, The Bread Baker's Apprentice, which is the first bread cook/baking book I ever bought (also from my college days).  The poor book lost it's slip cover along time ago, is ripping at the seams, and has flour and oil stains on every page.  It has been well used.  I used the Italian Bread recipe (p. 172) with some slight modifications.  This bread uses a preferment (Biga) which I made with sourdough instead of commercial yeast and I used whole wheat flour instead of white flour.  I also used kefir instead of water in the Biga to help tenderize the bread further since I planned on using half for sandwich rolls.  This made a great soft whole wheat loaf with a slight tang of sourdough.  Here is my recipe (as usual all of my measurements are by weight).

Night before (Biga):


3 oz sourdough starter (100% hydration, equal parts flour and water)
11 oz whole wheat flour
6-7 oz kefir (or milk or water)

Final dough (next morning)

Biga (about 18 oz)
11.25 oz bread flour

.41 oz salt
.5 oz honey
.5 oz olive oil
7-8 oz water

The night before you plan to make the bread mix together all of the Biga ingredients.  Stir well until all of the flour is hydrated.  Cover and let sit out at room temperature over night (up to 12 hrs).

The next morning the Biga should be airy and bubbly.  Add all of the final dough ingredients into the bowl of a stand mixer.  Stir on low speed with the paddle attachment until all of the flour is hydrated and ingredients are thoroughly mixed creating a ball of dough (you may need to dribble in a little water until all of the flour is incorporated).

Switch to the dough hook and knead for 10 minutes.  The dough should be supple and elastic and tacky not sticky (you may need to add more flour while kneading to reach this consistency).

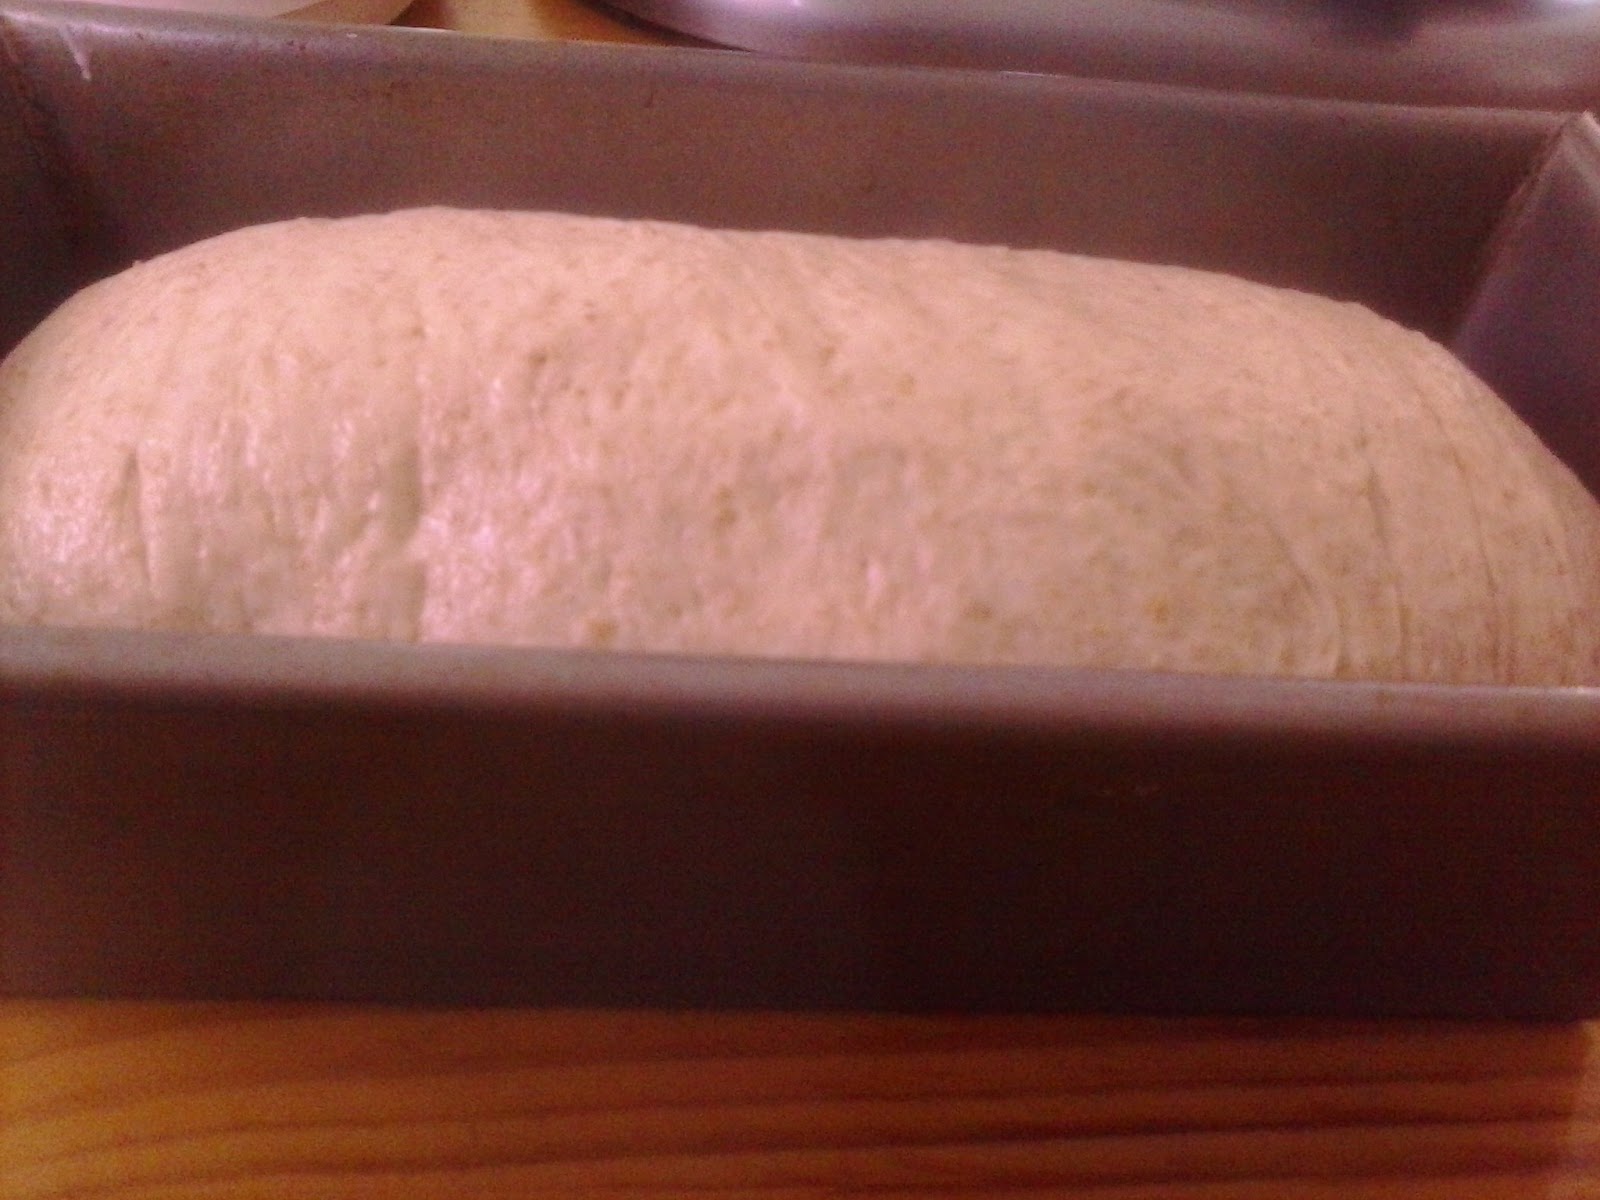
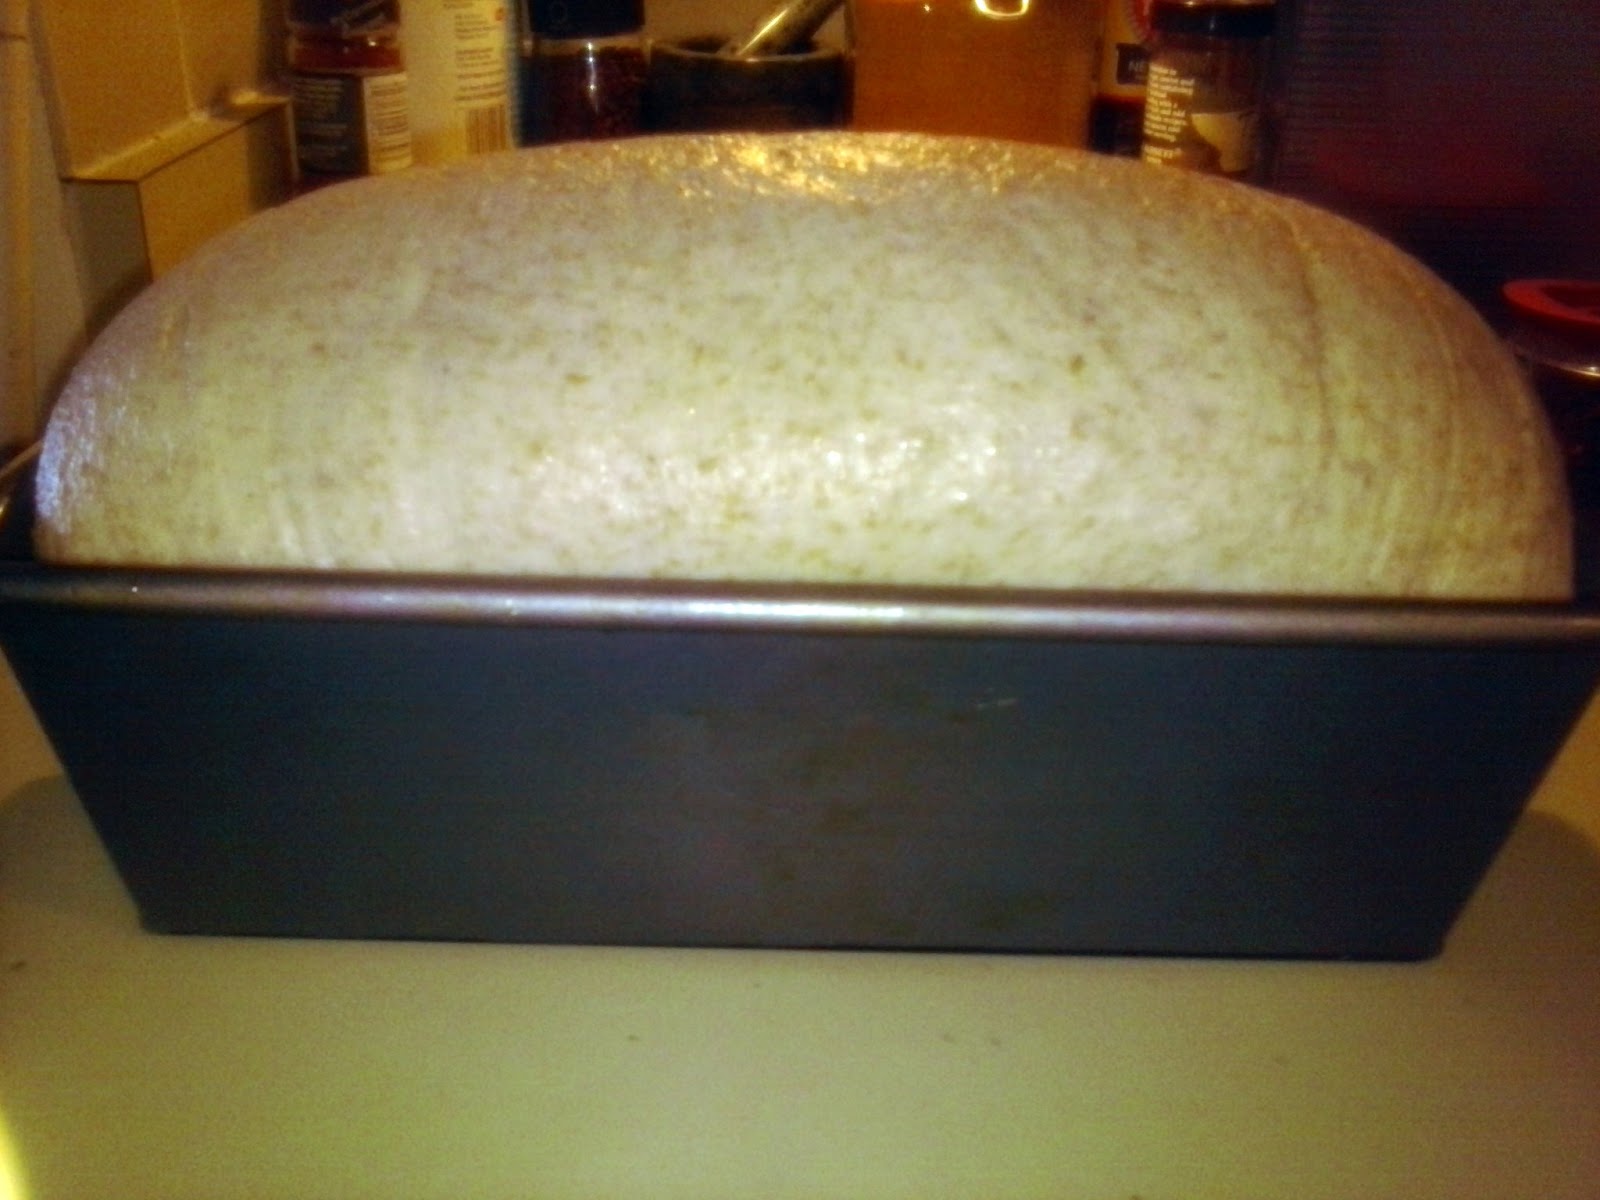
Transfer dough to a lightly oiled bowl rolling to coat it all over with oil.  Cover with plastic wrap and sit in a warm place for 4 hours until doubled in size.

Remove the risen dough from the bowl.  Cut in half.  You can make two 1-pound loaves, or I sometimes make 3 smaller loaves so they fit more easily on my baking stone.  This time I made 4 torpedo rolls and 1 loaf.  Place loaves and/or rolls on parchment or lightly floured sheet pans.  Cover with plastic wrap and allow to rise for about 2 hours and is 1 1/2 times original size.

Preheat oven and baking stone, on the lowest rack, to 500F for at least 45 minutes (if you are using sheet pans you can bake the loaves and rolls directly on the pan, no need to use the baking stone in this case).  Transfer the loaves or rolls to a peel or rimless baking sheet.  Score loaves with diagonal slits and rolls with one long slit (lengthwise).  Slide loves/rolls onto the baking stone (if you have trouble transferring loaves/rolls into oven, like I do, you can slide them in directly on the parchment paper but you have to pull the parchment out from under the bread after about 5 minutes because it will start to blacken and burn at such a high temperature) and spray the sides of the oven with water a few times to create steam, close the oven and then spray again after 30 seconds.  Do this 3 times then lower the temperature to 450F.  Bake loaves for 20 minutes and rolls for 15 turning 180 degrees half way through for even baking if necessary.

Allow to cool for at least 1 hour before cutting.  Enjoy.


Read more ...

Monday, January 28, 2013

Meatball Sub

Yum

Way better than subway.  This Meatball Sub is the third meal made from my Slow Cooker Meatballs in a Whole Wheat Italian roll smothered in cheese.


Meatball Sub:  Way better than subway.  This Meatball Sub is the third meal made from my Slow Cooker Meatballs in a Whole Wheat Italian roll smothered in cheese.
I really love meatballs.  They are so versatile.  I am usually not a fan of eating leftovers, but when I'm just cooking for myself it's much easier.  The main reason I made the Slow Cooker Meatballs was that I wouldn't mind eating them for a week.  Part of their attraction is that I can do so many different things with them to make them just a little different.

I thought about making a Meatball Sub even before the meatballs were cooked. To make sure my meatball sub was perfect I made home made rolls for it.  The most important thing in making a good sandwich is good bread.  Of course making your own is not a must, but I urge you to use a good hoagie roll. I will post my Whole Wheat Italian Bread recipe soon.

Ingredients:
*For one sandwich

Roll
3-4 meatballs and sauce
2 Tbsp parmesan cheese
1/4-1/2 cup mozzarella

Split open a roll and tear out a shallow trench from the center (to make a depression for the meatballs so they don't fall out.  You can save the bread scraps for bread crumbs--I just ate them because I was using a delicious fresh homemade bread and couldn't resist.).  Line the depression with 3-4 meatballs and pour some sauce over.  Sprinkle on the parmesan and then the mozzarella.  With the sandwich laying flat, broil in the oven until the cheese melts and the meatballs are heated  (I did this on a low rack far from the top heating element it took longer to melt the cheese but it assured that the meatballs were heated through before browning--about 15 minutes). Enjoy

Read more ...

Friday, January 25, 2013

Meatball Pizza

Yum

Round two of my meatball extravaganza (I know I get a little weird when I spend a lot of time alone)


Anyway, I used my Slow Cooker Meatballs to top a thin crust pizza.  It was delicious.  I thought about adding onions and peppers to the pizza but then I changed my mind and just used meatballs.  I think that was the right choice.  It was a simple way to make a different meal out of basic meatballs.

I used a homemade pizza dough that I had in my freezer.  I just had to thaw it overnight in the fridge and it was ready to go.

Ingredients:

Pizza dough (enough for an individual/small sized thin crust pizza)
4 meatballs, cut in half
3 tbsp meatball sauce
Parmesan
mozzarella
red pepper flakes

Preheat the oven and pizza stone (on bottom rack) to 500F.

Take the dough from the refrigerator about 2 hours before cooking to take the chill off (or follow the directions of your pizza dough).  Press and stretch the dough until you have about a 9 inch round that is about 1/8th of an inch thick/thin (once I have the dough rolled out I put it on a sheet of parchment paper to make transferring easier).  Spread the dough with the sauce and then add the meatball halves (cut side down so they don't roll around).  Sprinkle on a small hand full of parmesan cheese then top with mozzarella (I used about 1/2 cup use as much or little as you like).  Finally, shake on some red pepper flakes.

Transfer the pizza to a rimless baking sheet (Trim the parchment to the edge of the pizza, any overhang will burn at such a high temperature).  Slide the pizza onto the hot pizza stone and bake for about 10-15 minutes until the cheese melts and the edges are browned and crusty.


 Enjoy.
Read more ...

Wednesday, January 23, 2013

Slow Cooker Meatballs

Yum

Tender meatballs in tomato sauce cooked in a slow cooker.


When my husband is away I don't like to cook very often.  I'm just not inspired to make big dinners when they are just for me.  While I don't mind cooking less it's not great for the blog.  I've only been blogging for a relatively short time and do not have a lot of posts and pictures built up for uninspired days.  Luckily, I had a genius idea (at least I thought so) I would make a dish that was simple, big, and I wouldn't mind eating all week.  My genius idea was meatballs.  I  haven't had spaghetti and meatballs in a very long time, and I have never actually made them before so I was challenged and excited to try them.  I searched a favorite blog (Italian Food Forever) and found a great and simple recipe for meatballs.  I followed this basic recipe but used a slow cooker to let the sauce cook all day.

Ingredients:

Sauce

1 medium onion, sliced
6-8 cloves garlic
2 cans diced tomatoes (14oz each)
3-4 oz tomato paste (a little over 1/4 cup)
1/4  cup brandy, optional
1-2 cup fresh basil
2 tsp dried basil
1/2 tsp dried oregano
1/2 tsp beef bullion
salt and pepper to taste

Meatballs

1 pound ground meat (beef and pork part Italian sausage would be great)
1 thick slice soft bread
1/2 cup milk
1 egg
2 Tbsp parmasean
1 Tbsp minced fresh parsley
salt and pepper to taste


Toss the onion slices and garlic cloves with some olive oil, salt, and pepper.  Lay out on a baking sheet and roast in 350F oven for about 20 minutes until tender and fragrant.  Meanwhile, add the canned tomatoes (and their liquid), tomato paste, brandy, (I learned on an episode of Good Eats that tomatoes benefit from the addition of alcohol, apparently it brings out flavor that you do not get without) beef bullion, and spices to a blender.  When the onion and garlic are roasted add them to the blender as well.  Puree the mixture until smooth then pour into the slow cooker.  Cook on low heat for about 5 hours.

Mix the meatballs.  Soak the bread in milk until it is absorbed and the bread is very soft (you could also soak the bread in a red wine I bet that would be great I just didn't have any).  Mix all of the meatball ingredients together until thoroughly combined.  Roll into golf ball size or slightly smaller pieces (makes 20-24).

Gently  drop the meatballs into the sauce in the slow cooker.  Turn heat to high and cook for at least 2 hours longer (do not stir until about 1 hour after adding the meatballs or they will break apart).

Cook pasta of your choice and serve meatballs and sauce over pasta.  Makes about 8 servings.

The great thing about meatballs is that they taste even better the next day, and there are many ways to change them up so it's not the same dinner night after night.  I put them on top of cheese toast
and I plan to make pizza and a meatball sub later.  Check back in to see these other uses for meatballs. Enjoy.

Read more ...

Monday, January 21, 2013

Garlic Shrimp Stir Fry

Yum

A healthy stir fry made with shrimp, vegetables, and lots of garlic.

Garlic Shrimp Stir Fry:  a healthy stir fry made with shrimp, vegetables, and lots of garlic.

I have been waiting to post this recipe.  It is one of my quick standby recipes that I have made many times and know it is delicious.  Once every thing is ready it cooks up in minutes and the only time consuming part is peeling the shrimp.  This can be made easier if you buy pre-shelled shrimp or shell the shrimp the night before and let them sit in the marinade overnight.

Garlic Shrimp Stir Fry:  a healthy stir fry made with shrimp, vegetables, and lots of garlic.

I have found it is easier to shell and de-vein shrimp using kitchen shears.  I take the headless shrimp and stick my shears into the center of the head side and cut a line down the middle of the back (where the vein is), then I can pull the vein out and peel the shrimp easily.  This is also a great method if you want to leave the shell on but remove the vein.

Garlic Shrimp Stir Fry:  a healthy stir fry made with shrimp, vegetables, and lots of garlic.

One thing I will add to my marinade in the future is about 1 tablespoon of oil.  I watched an episode of America's Test Kitchen and learned that garlic flavors are oil soluble so to bring out more flavor from the garlic in a marinade add some oil. (I tried this and it works-4/7/14)

(Updated with new pictures 4/7/14)


Garlic Shrimp Stir Fry


Ingredients:
recipe from about.com Thai food

1 lb shrimp, peeled and deveined
1 head broccoli, cut into bite sized pieces
1 red onion, chopped
1 carrot, julliened
1/4 lb shredded bamboo shoots (about 1/2 cup


Marinade:

2 Tbsp fish sauce
2 Tbsp soy sauce
2-4 Tbsp oyster sauce
4 Tbsp fresh lime juice (about 2 lime)
2 Tbsp brown sugar
2 red chillies, minced (more or less depending on your tastes)
1 head of garlic, minced
1 Tbsp dried shrimp, optional (I just added them because I have them and I could)
1 Tbsp canola oil and I added a splash of hot chili oil

Garlic Shrimp Stir Fry:  a healthy stir fry made with shrimp, vegetables, and lots of garlic.

Mix the marinade ingredients and pour over the shrimp in a resealable bag. Mix the shrimp and marinade well, then, refrigerate for at least 1 hour. Meanwhile, prepare the other ingredients (the vegetables I used are just what I like and can get easily feel free to use anything you like or have on hand).

When ready, heat a large fry pan or wok over medium heat. When pan is hot, add vegetable oil (about 1 Tbsp) then the broccoli, onions, and carrot. Stirfry until vegetables are slightly tender (if the pan is hot enough this should only take a few minutes or less).  Next, mix in the bamboo shoots and finally the shrimp and their marinade sauce. Mix around until shrimp are pink and cooked. You may want to add up to 1/2 cup of water depending on how dry it looks and how much sauce you like. Once shrimp are cooked (should be very quick, just a few minutes), remove from heat. Serve over rice and garnish with cilantro or green onions. You may also serve with lime wedges, fresh jalapeno, and some Thai basil if you like.

Serves 4.

Enjoy.

Garlic Shrimp Stir Fry:  a healthy stir fry made with shrimp, vegetables, and lots of garlic.

Linked to:  Much Ado About Monday. Two Cup Tuesday, Tasty Tuesday, Brag About It, Whimsy Wednesday, Lou Lou Girls, Eat Create Party, Freedom Friday, Best of the Weekend, Show Stopper, Saturday Night Fever, See Ya in the Gumbo, Food on Fri


Follow Joy Bee's board Joybee Whats for Dinner blog posts on Pinterest.
Read more ...

Saturday, January 19, 2013

Pepper and Onion Breakfast Pizza

Yum

A crunchy and delicious breakfast pizza with roasted peppers and onions atop cream cheese on a pita with a beautiful egg center stage.


I do not like eggs.  I keep trying them in a variety of ways, but no matter what I have tried I just do not like plain eggs.  However, I have found I enjoy eggs if they are with other ingredients.  I like quiche with bacon and plenty of cheese, and I like scrambled eggs with salsa.  This Breakfast Pizza is another way I can enjoy an egg.  Here the egg lies in the center of roasted peppers and onions atop a cream cheese spread pitta and is baked until set.  I found this recipe on another blog but it was called a Galette and was atop a sour cream spread puff pastry.  I never have puff pastry on hand, I'm sure it is delicious but I'm kind of bitter that it isn't something I can make so I almost never buy it.  I had just recently made Ricotta Bread Pitas so I used that instead.  Since the bread base is thicker and hardier than puff pastry I also decided to use cream cheese and I call it a pizza because I'm not sure if I can call it a galette anymore.  No mater what I call it, it is good.

Ingredients:

1 red bell pepper, sliced
1/2 large red onion, sliced
1/2 tsp dried thyme
salt and pepper, to taste
dash cumin
dash coriander
2 pitas
2 Tbsp cream cheese (or try fresh ricotta)
2 large eggs
a few snips of fresh cilantro

Toss the peppers and onions with spices and some olive oil.  Spread on a baking sheet and roast at 400F for 20 minutes until soft and caramelized.

Spread about 1 Tbsp of cream cheese on each pitta.  Then, top with roasted peppers and onions.  Make a kind of well in the center and pour in a cracked egg being careful not to break the yolk (I crack the eggs one at a time into a small bowl or ramekin, then pour it onto the pizza).  Bake pizzas at 425F for about 10-15 minutes until eggs are set.

Remove pizzas from oven and top with a sprinkle of fresh snipped cilantro or parsley.  Makes 2 individual pizzas.  Enjoy.


Read more ...

Friday, January 18, 2013

Half Whole Wheat Sandwich Bread (Sourdough)

Yum

A delicious, soft, and sour sandwich loaf with the goodness of whole wheat.

*Submitted to YeastSpotting

I like to have sandwich bread on hand but I don't like to buy the usual kind you find in the stores.  Store bought sandwich bread is too soft and mushy and flavorless to my tastes.  It also has preservatives (which I have never used to make bread) and I think it's creepy to have bread for weeks before it starts to mold.  Mostly, I just enjoy making and baking my own bread.  There is something about the smell and taste of freshly baked bread that just makes me feel good and I like to think it is better for me than store bought.

My main struggle with sandwich bread is getting it so that it is soft (soft enough to make a good peanut butter and jelly with) and doesn't crumb too much.  What I have found (at least in my non-professional opinion) is that in order to achieve this  you need to keep the dough pretty soft and moist.  Do not add too much flour while kneading you want the dough to be soft and moist but not wet and sticky.  It is hard to explain because you know it is right by the feel.  I find that when kneading by hand I tend to add too much flour, to keep the dough from sticking to my hand, but since I started using a mixer it is easier to knead without adding too much flour.  It is still possible to do it by hand you just have to be aware of how much extra flour you are using (it is okay for it to stick slightly to your hand.  Maybe just dust your hands lightly with flour instead of sprinkling flour over the dough).

Ingredients:
*modified from Peter Reinhart's Whole Grain Breads 'transitional whole wheat bread'

Night before (barm)

3 oz sourdough starter
7 oz whole wheat flour
6 oz kefir or milk

Next day

barm
7 oz bread flour
1 tsp salt (.45oz)
2 oz honey
.5 oz vegetable oil
3-5 oz water

The night before you want to make your bread you need to make the barm.  This is just feeding the sourdough to build it to the amount you need for the recipe.  Take out  3 oz of the sourdough starter add 7 oz of whole wheat flour and 6 oz of kefir or milk. (I make the barm with the whole wheat flour because I think that the over night sit tenderizes it and moistens it this makes up for the soaker that many whole wheat recipes call for.  I also use kefir because I like the extra sour flavor it adds.)  Stir until all of the flour is hydrated then cover and let sit out at room temperature over night.

The next morning, the barm should be bubbly and airy. To the bowl of a stand mixer, add barm and rest of ingredients starting with only 3 oz of the water.  Stir on low speed with the paddle attachment until all of the flour is hydrated and forms a ball.  You may need to dribble in some of the extra water until this is achieved (remember it is better to start too wet than not wet enough, adding flour during kneading is easier than water) .
Switch to the dough hook and knead on medium speed for 5-6 minutes adding more flour (white or wheat) as necessary.  The dough should pull away from the sides of the bowl but just slightly stick on the bottom.  It should feel soft and elastic and be tacky not sticky.  Transfer dough to a large, oiled bowl rolling to coat the dough with oil.  Cover with plastic wrap and sit in  a warm place  to rise for 4 hours. (I sit my dough on my counter top under a small under-cabinet light that gets a little warm.  This is the  perfect temperature in my home.)
 When the dough has risen to double its size, roll into a sandwich loaf and place in a creased 8 by 4 inch loaf pan.  Cover with plastic wrap and let sit in warm spot for 2 hours until cresting above the lip of the pan.
Bake in 350F oven for 20 minutes, then turn 180 degrees and bake 20 minutes more.  If the top gets too dark cover with aluminum foil (I had to do this after the first 20 minutes).  Remove from pan and let cool completely (or at least 1 hour) before slicing.
Enjoy.


Read more ...

Thursday, January 17, 2013

Breaded Lamb Chops

Yum

Broiled lamb chops with a seasoned bread crumb crust


Before my husband left for  his 2 month work trip I made him a good dinner.  Hubby always complains about not having good home cooked meals and eating out too much while away so I always try to do something special before he leaves and when he gets back.  He loves lamb and when ever I see it on sale I pick it up so I had some lamb chops.  Lamb is somewhat intimidating for me because I never grew up eating it, and I don't have the chance to cook it often.  My idea was to make breaded lamb chops similar to the shake-n-bake pork chops I grew up eating. I made fresh bread crumbs from the end of my Ricotta Bread loaf, added some spices and covered the lamb chops with it.  The method of cooking the chops I found online, I just googled 'how to cook lamb chops' and found plenty of ideas so I chose to broil them.


Ingredients:

1 cup bread crumbs or left over bread
pinch of salt and pepper
1 tsp oregano
1 tsp thyme
1/2 tsp garlic powder
1/2 tsp minced onion
2 lamb chops (about 1 inch thick)
pinch salt and pepper
4 tsp Dijon mustard


Cut the bread into cubes and pulse in a blender to make crumbs.  Add salt, pepper, oregano, thyme, garlic, and onion, pulse a few more times to help chop and mix in the herbs.

Meanwhile, allow lamb chops to sit out at room temperature for at least 1 hour so the chops are no longer cold.  Season chops (one side at a time) with salt and pepper then brush with 1 tsp of mustard (per chop, per side) and sprinkle on the bread crumbs, press to adhere. Do the same on the other side.

Place chops in a baking pan and broil about 3 inches from the heat element for about 10 minutes per side.  (I used the toaster oven so the time may be different for a conventional oven).  Let rest for about 5 minutes before serving.  Serves 2.  I served the chops on top of barley with roasted Brussels sprouts on the side (I just recently found out that it is Brussels--as in Brussels, Belgium--sprouts not brussel sprouts).  Enjoy.


Read more ...

Tuesday, January 15, 2013

Peanut Butter Bars

Yum

Deliciously sweet and chewy peanut butter comfort food.


I'm a little down today.  This is weird because it is so rare, but my husband just left for a work trip that will keep him away for 2 months.  I love alone time and usually enjoy the time he is away but today  is also a dreary, rainy day and I just need some comfort. 


Enter the Peanut Butter Bars.  These dessert bars were a favorite when I was growing up.  Any school or friend function that required food my sisters and I would always make and bring Peanut Butter Bars.  We used to make these so often I had the recipe memorized.  However as I got older I just didn't make them as much and it has been a very long time since I last made them...luckily I found the recipe again. They are like brownies only with peanut butter instead of chocolate.  Just smelling them bake brings back memories and makes me smile.  I feel better already.


Ingredients:

1/2 cup butter (1 stick)
1/2 cup peanut butter
1 1/2 cup sugar
2 eggs
1 tsp vanilla
1 cup flour
1 1/2 tsp baking powder
1/2 tsp salt


Preheat oven to 350F.  Grease and flour a 9 by 13 baking pan.  In a large bowl melt the butter and peanut butter (I just melt them in the microwave on high for 30 seconds).  Stir in sugar then the eggs, vanilla, flour, baking powder, and salt.  Mix well (I do this all by hand with a wooden spoon for old times sake and because it's quick and simple, but you could use a mixer if you prefer).  Pour batter into the prepared pan, smooth and fill pan then bake for 20 minutes.  Makes about 24 bars.

You can add chocolate chips or other candy to the batter if you want (it is all very good), but I just wanted the simple, comforting peanut butter bars I'm familiar with.

Enjoy.

Read more ...

Saturday, January 12, 2013

Pumpkin Pancakes

Yum

These whole wheat pancakes are eggless, fat free, and flavored with pumpkin puree.


I like to make breakfast on the weekends.  I'm not a usual breakfast eater.  During the week it's just a granola bar or a smoothie, but  on the weekends I like to go all out (granted by the time I finish cooking it's usually more of a brunch or lunch but that's fine with me and Hubby).  This time I was out of eggs and only had a couple of strips of bacon so it took me a while to decide what to make.  I usually like a little salty with sweet for breakfast so I was definitely going to cook the bacon but it  wouldn't be enough, so I added some hash brown potatoes and pancakes.  My only problem was that I didn't have an egg for the pancakes.  Then I remembered I had a can of pureed pumpkin.  I know that mashed bananas are sometimes used as a substitute for eggs in baking, so why not pumpkin?  So I experimented and it worked, the pancakes were fluffy and soft and pumpkiny.  I will definitely make these again with or with or with out an egg.  Also these pancakes are fat free.  There is no oil or butter in the mix, however, I cooked them with butter and then topped with butter because I like the flavor.  If you have a good non-stick pan you may not need any oil or butter and you can make these really fat free if you want.

This recipe is modified from Low Fat Whole Wheat Pancakes

Ingreients:

3/4 cup whole wheat flour
2 Tbsp flax seed meal
2 Tbsp oat bran
1 tsp baking powder
1/2 tsp baking soda
1/2 tsp salt
1/2 tsp cinnamon
1/8 tsp allspice
1/2 cup pumpkin
1 cup skim milk kefir
2 Tbsp honey


Mix all of the dry ingredients in a medium bowl.  I use the flax and oat bran because I had it and it adds a little more fiber and nutrition.  You could just use 1 cup of whole wheat flour and omit the flax and oats.

In a separate small bowl mix the wet ingredients (pumpkin, kefir, and honey).  I used kefir instead of buttermilk because I had it and I make it with skim milk so I know it's fat free.  You could of course use buttermilk but I don't know if there is fat free buttermilk.  You could also use sour milk which is just 1 cup of milk with 1 tsp of vinegar and use skim milk.

When ready to make the pancakes, add the wet ingredients to the dry and stir until just mixed.  Then fry in a non-stick pan or on a griddle set to medium heat (I used an ice cream scoop to size these pancakes).  When edges set and you start to see bubbles, flip the pancake and cook the other side.  Makes 5 pancakes.  Serve with maple syrup. Enjoy.


Read more ...

Thursday, January 10, 2013

Ricotta Bread (Sourdough)

Yum

A delicious sourdough made with fresh ricotta cheese.


I made some fresh ricotta cheese at home the other day.  It was my first time, and it was so easy.  Anyway, that is for another post but it gave me the idea of putting some ricotta in a bread recipe.  I used the same recipe (or formula) as Potato Garlic Bread, but replaced the potato with ricotta, and omitted the garlic while adding some honey.  The result was this beautifully browned loaf with a tight and soft crumb.  This makes it great for sandwiches.  The flavor is great,  sour with just a hint of cheese, it can be used for either sweet or savory purposes.  I'm already thinking about what else I can add when I make it again.

Ingredients:

14 oz barm
14 oz bread flour
.30 oz salt (1.5 tsp)
6.75 oz ricotta (a little over 1 cup)
1 oz honey
1 oz olive oil

The night before, prepare the barm.  I used 2 oz of my sourdough starter and built it to 14 oz by adding 6 oz flour and 6 oz water (I keep my sourdough starter at 100% hydration, that means equal parts flour and water for this recipe I used whey that was leftover from making the cheese).  Stir until all of the flour is hydrated and leave, covered, overnight.  After 10-12 hours the barm should be very bubbly.

The next day add the barm, flour, salt, ricotta, honey, and olive oil to the bowl of a stand mixer.  Using the paddle attachment (or a spoon if by hand) stir until all the flour is hydrated and ingredients form a ball, you may need to dribble in some more water to hydrate all of the flour.

Switch to the dough hook and knead for about 6-8 minutes on medium low speed (or 10-15 by hand) until dough becomes smooth and elastic.  It should be soft and tacky but not sticky (add more flour as necessary to reach this consistency).  Place dough in oiled bowl, rolling it to coat all sides with oil, cover with plastic wrap, and let rise for 4 hours until doubled in size.

Once risen, cut dough in half and form two boules (round loaves).  Place on a parchment covered baking sheet and cover with plastic wrap.  Let rise for 2 more hours, them bake at 400F for 20 minutes, turn 180 degrees and continue baking for 15-20 minutes more until browned all over. Let cool for at least 1 hour before cutting and serving.

I did not want 2 loaves so I made 4 pitas with half of the dough.  After the first rise, instead of forming the second boule, I cut the dough into 4 pieces of about 4 oz each.  Then I rolled them out and baked them (at 500F) until they puffed.


Read more ...

Sunday, January 6, 2013

Bacon Wrapped Potato Wedges

Yum

A delicious football snack made with soft potato wedges wrapped with crispy bacon.


Bacon Wrapped Potato Wedges:  A delicious football snack made with soft potato wedges wrapped with crispy bacon.


Best football snack ever, or at least (that I've made) so far.  I think I've mentioned that I love bacon, these little wedges are awesome.  I parboiled small potato wedges, tossed them in oil and spices, wrapped with raw bacon and baked until the bacon became crispy.  The bacon wrapping part took the most time, but it was well worth it, these were a huge hit.  The potato was soft and warm while the bacon was nice and crisp, a great combination.  And it used some of the 20 pound bag of potatoes we got around Thanksgiving (we have made big pots of mashed potatoes twice, baked potatoes a few times, scalloped potatoes and more. We are down to only 2 potatoes now, yay.)


Bacon Wrapped Potato Wedges


Ingredients:

2-3 large potatoes
1 lb bacon (about 1 1/2 lbs)
salt
pepper
garlic powder
olive oil


Cut the potatoes into small wedges.  (I had huge potatoes so I cut them in half crosswise then each half into 8 pieces lengthwise, maybe more for some of the bigger pieces and I left the peel on.)  Then, boil the potatoes for just a few minutes until barely soft (about 2-3 minutes or less depending on the size of your pieces).

When the potatoes finish boiling, drain immediately and rinse with cold water.  Toss the wedges in spices and olive oil (the oil is only to help the spices stick to the potatoes).  Wrap each wedge with 1/2 slice of bacon, secure with toothpick (the toothpicks also make picking up and eating easier) and place on a baking sheet.

Bake in a 425F oven for 20 minutes, then broil for about 5-10 minutes (keep watch on the wedges during broiling you want them to get browned but not burn).  Carefully remove the wedges from the pan an place on a napkin to absorb some grease and cool.  Serve with ranch or sour cream for dipping.  Makes 32-48 wedges (you are only limited by how many potatoes you cut and how much bacon you have).  

These were awesome, I prepared 2 pans of 24 wedges but we did not have as many people for the game as we thought, so I only baked 1 pan.  I put the second pan in the freezer and then bagged the wedges once frozen.  I will try baking these from frozen sometime.  Everybody loved them.

*update:  I thawed the frozen wedges overnight and then baked them as above.  They were still great.

Enjoy.


Linked to:  Mums Make Lists
Read more ...

Saturday, January 5, 2013

Bacon Egg and Cheese Sandwich

Yum

A great breakfast sandwich on Potato Garlic Bread with bacon, egg, and creamy Boursin cheese.


I love bacon.  Growing up I rarely got to eat much bacon.  I grew up in a family of 6.  My mom would only occasionally cook bacon (only on rare weekends), and when it came to eating the bacon, being the youngest, I only got a few strips and always wanted more.  Now that I'm older, I cook the bacon and it's only me and my husband so there is plenty of bacon to go around.  Unfortunately, I care more about healthy eating now so I try not to make and eat bacon all the time but I still like to make it for breakfast on some weekends.  One sure way to get my husband out of bed on a Saturday or Sunday is to wake him with the smell of cooking bacon.

This is my most recent breakfast creation.  It isn't anything fancy, just a bacon, egg, and cheese sandwich with my own twist.  Along with bacon (we usually buy a 5 pound pack, of individually packaged 1 pound packs from Costco) we usually have some Boursin cheese in our freezer.  Boursin cheese is creamy and crumbly and very tasty on breads or crackers.  I had Potato Garlic Bread to use as the base of the sandwich and garlic and herb Boursin.  I blended the Boursin with a little mayonnaise in order to make it more easily spreadable.  Here is my basic recipe.


Ingredients:

4 slices of bread, toasted
1/2 lb bacon
1 package Boursin cheese, any flavor
1-2 Tbsp mayonnaise
fried egg(s)

First cook the bacon.  I like to fry it in a cast iron  pan (over low temperature to keep the pieces flat).  I have noticed when they cook too high and fast they get all curled and are more difficult to put on a sandwich.  I usually fry them at a higher temperature when I don't care if they stay flat or not.  I also like to pour the grease out of the pan between each batch, I think that this helps keep the pieces from curling and it prevents splashes of hot grease. Lay cooked bacon on a napkin to absorb some of the grease.

Meanwhile, prepare the cheese.  Drop an, unwrapped, pack of Boursin into a food processor with the metal chopping blade.  Add the mayonnaise a little at a time while pulsing until cheese becomes smooth and easily spreadable.

Next, toast the bread and smear each piece with the cheese spread.  Layer on the bacon (the cheese helps the bacon adhere to the bread so that it doesn't fall off while eating), top with a fried egg, and finish with the final piece of bread.  This is enough for 2 sandwiches but you will have left over cheese spread to enjoy with more bread or crackers.  I do not like eggs so I just had a bacon and cheese sandwich and it was great.  Pair with fruit and milk or coffee for a complete meal.

Enjoy.
Read more ...

Friday, January 4, 2013

Mushroom and Chicken Barley Pilaf

Yum

A delicious and nutritious pilaf made with onions, mushrooms, mizuna, chicken, and barley.  A great dinner on a cool rainy night.


All week the weather here in Honolulu has been rainy, dark, and chilly (I would say cold, but it's only in the 60s--Fahrenheit which in reality is not cold but when you are used to sunny 80 degree days if feels cold).  While I prefer warm sunny days, this weather has its uses mainly being I feel inspired to make winter time recipes.

I have been thinking I should incorporate more whole grains into my diet and I came across a recipe for Mushroom and Caramelized Onion Barley.  This recipe was used as a side dish so I made my own tweaks to make it a full meal.  I also recently found another mushroom recipe that I had to try  called Bourbon Mushrooms.  My recipe mixes these two recipes and adds some new items to make a filling and nutritious one pot meal.

Ingredients:
  • 1 large red onion, chopped
  • 5 cups sliced mushrooms (I used a combination of crimini, button, king trumpet, and shiitake)
  • 4 cups mizuna, chopped (or any slightly peppery green)
  • 1/4 cup bourbon (I used Jim Beam, but any would be fine or use a few dashes of worchestire sauce instead)
  • 3 cloves garlic, minced
  • 2 tsp dried thyme
  • 1/2 cup dried barley
  • 1 1/4-2 cups chicken broth
  • 1 cup chopped (precooked) chicken
  • 1/2 cup chopped pecans
  • salt and pepper to taste
  • olive oil


In a large pot heat about 1-2 tsp olive oil over medium heat then add onion,  cook uncovered for about 30 minutes stirring occasionally until onions caramelize.

Then, add the mushrooms and stir.  Cook for about 15 minutes more and add garlic and thyme cooking for about 1 minute until fragrant.

Add the mizuna (or other green of your choice.  I just learned what mizuna was the other day.  I kept seeing it at the market and it was inexpensive and neat looking so I asked around until someone was able to tell me what it was, then I googled it) and bourbon.  Cover the pot and let the mizuna cook down until wilted it should only be a minute or two.

Add salt and pepper (I read some where that you should only add salt at the end when cooking mushrooms)  then add the barley and chicken broth.  Bring to boil and reduce temperature to simmer and let cook for 30-45 minutes until barley softens and the liquid is absorbed (if you soak the barley overnight the cooking time is shorter).  

Add the chicken and pecans last and turn off the heat and cover for a few minutes for the chicken to heat. (This is a great use for leftover chicken of any sort.  I used leg and thigh meat, but breast meat would be fine too.  For a vegetarian meal omit the chicken completely and use a mushroom broth instead of chicken broth.)

Makes 4 servings.

I served this pilaf with a side of cauliflower.  It made a very filling and satisfying meal.  It was great.  If you like mushrooms this is the recipe for you and it's nutritious.  Enjoy.
Read more ...

Thursday, January 3, 2013

Vermicelli Salad

Yum

This fresh salad uses leftover prime rib, rice noodles, and crisp lettuce and sprouts.  A great light and nutritious dinner.


Vermicelli Salad:  This fresh salad uses leftover prime rib, rice noodles, and crisp lettuce and sprouts.  A great light and nutritious dinner.


About 5 years ago, when I lived in Houston, TX, I lived right next door to a great Vietnamese restaurant.  At least weekly (or maybe more often) my husband and I would have lunch there.  Almost every time I ordered the char siu (or barbeque pork) vermicelli.  It was a delicious rice noodle salad with lettuce, sprouts and carrots topped with char siu and an amazing fish sauce based sauce to pour over it.  Since leaving Houston I have tried desperately to remake this at home.  While my recipe may not be the same, it is very satisfying.


One part I have not mastered is making the barbeque pork.  I have a few recipes I want to try but usually I buy char siu ready made from Chinatown.  This time I topped my salad with leftover prime rib.  Any meat or tofu is good.

I get all of the ingredients ready and in individual containers so when ready to eat everyone can make their own salad.  This could be fun for a dinner party just set everything up as a salad bar and let friends just walk through and make their own salad just the way they like it.  You could even have different types of meat or meatless options.  Here is what I use.

Vermicelli Salad


Ingredients:

Meat (leftover prime rib), sliced
Lettuce, any type you prefer
Sprouts
Rice noodles, cooked
Nuoc Cham
Mint leaves, torn
Thai basil leaves, torn

In a bowl, (the wider and deeper the better) add a handful of lettuce and a handful of sprouts.  Next, top this with the cooked rice noodles (for most noodles boil enough water to cover, then add the noodles and turn off the heat.  Let the noodles sit for 10 minutes in the hot water until soft.  Then, drain and rinse with cold water) I use a handful.  Last, add the meat, pour on about 2 Tbsp of the Nuoc Cham, make sure to add plenty of carrots (the carrots absorb the flavors of the sauce and taste so good.  My favorite part) and sprinkle on some mint and basil.  Stir to mix everything together and eat.


 An important component that makes the vermicelli so good is the sauce.  I have tried all kinds of recipes and the closest I have found so far is Nuoc Cham from finecooking.com  (I made a few tweaks of my own).  It has a good balance of salty, sweet, spicy and sour.


Nuoc Cham:

1/2 cup water
2 Tbsp brown sugar
2 limes (2 Tbsp lime juice)
1 clove garlic, minced
2 Tbsp fish sauce (you can substitute soy sauce or Braggs liquid aminos for vegan/vegetarian option)
2-3 bird chilies, sliced small
1 tsp sriracha (a chili and garlic sauce)
1 carrot, julienned (about 1 cup)

Heat the water in the microwave for about 1 minute and add the brown sugar.  Stir until the sugar dissolves.  Then, squeeze in the juice from 2 limes (you could also just use bottled lime juice although, I think fresh tastes better).  Next, add the minced garlic, fish sauce, chilies, and sriracha (you could just use the srircha and use more or less based on your own preference, but I find it missing with out the separate garlic and chilies too.  I did not have any chillies so I just used more sriracha this time).  Finally stir in the carrots (you can also use cilantro or green onions and these lend their own flavors, but carrots are my favorite.  I actually bought a food processor just to julienne carrots. It makes the process much easier and I use them for a lot of recipes.  I use the processor for many other things, but this was the main justification for the purchase).  The sauce is best if made ahead of time and allowed to sit for a few hours or even overnight.


This is just a basic guideline.  You can use any meat you want or no meat at all.  You can use any vegetable you like sometimes I add cucumbers, dikon and even some crushed peanuts for crunch.  The variations are endless and it is a quick meal to prepare.

Enjoy.
Read more ...